|
|
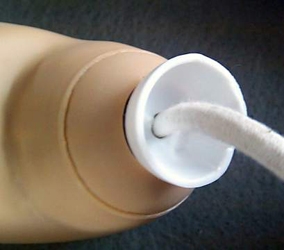
The limbs on
American Girl dolls and other "semi-strung" dolls are held into their
ball-and-socket joints by a length of elastic cord, a separate cord for each
joint.
Over time, the elastic cord will stretch, resulting in a loose joint and a
floppy limb. Fixing this problem is actually very simple and will take about
30 minutes.
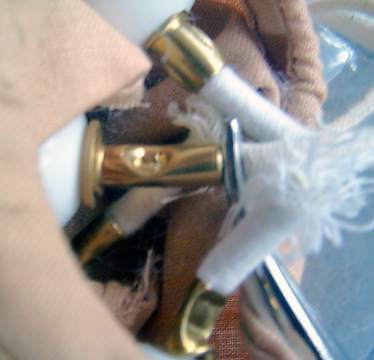
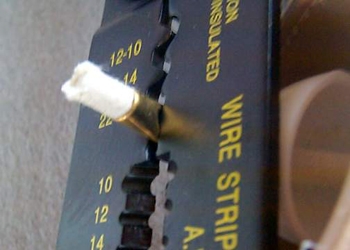
Tools needed include a pair of scissors, forceps or a hemostat (to hold the
cord under tension) and a crimping tool (a combo electrical stripper/crimper
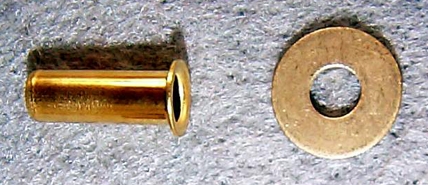
works great). Parts needed include a length of 1/8" cloth-covered elastic
cord, two 5/16" brass ferrules and two brass washers (3/16" center
hole). The ferrule and washer secure the cord on either side of the joint.
Ferrules, washers and the wire stripper/crimper are available at most hardware
stores. Look for the ferrules in the plumbing department, where they may be
called 5/16" tube insert sleeves. They are used in compression fittings and
go inside flexible plastic hose, like what is used in fish tanks, etc. The
ferrules keep the hose from crushing as the compression fitting is
tightened. (Strictly speaking, a ferrule goes around the outside of
something, like the elastic cord; these "insert sleeves" are made to go on
the inside of a piece of plastic tubing. We are using these "inserts" as
ferrules. Neat, huh?)
1/8" elastic cord for restringing can be found at:
A Dolly's World
Mini World
Search for "elastic" to find it.
The hemostat is available from
A Dolly's World
and National Artcraft (search for
"clamp").
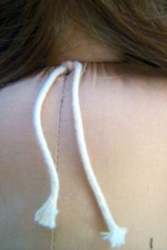
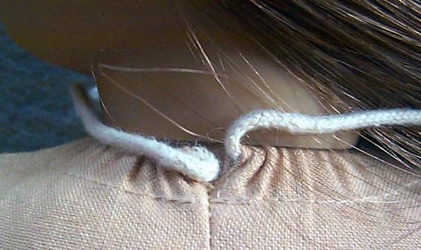
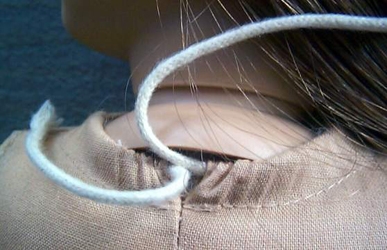
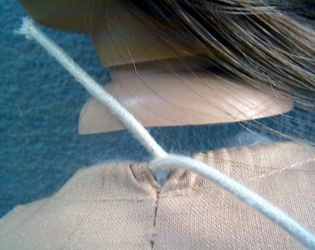
First, undress the doll, untie the string at the back of her neck and remove
her head.
Remove all of the stuffing from the doll and put it safely aside. It takes a
lot to stuff such a small body.

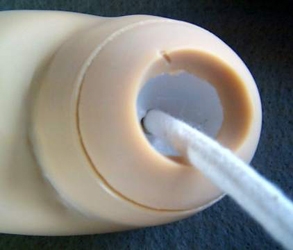
Once the stuffing is removed, you will see the inside ends of the elastic
cords, one for each limb.
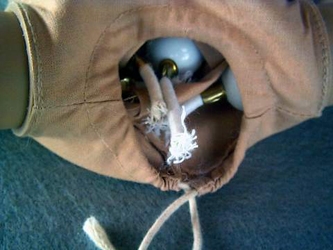
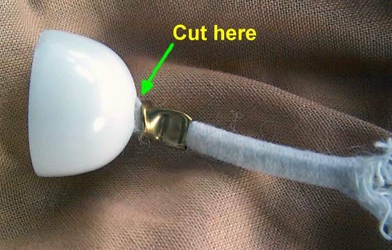
Select the cord for the loose joint on the inside of the doll and, while
pulling on it, cut the cord as shown between the ferrule and the dome-shaped
plastic cup, releasing the joint. There are two of these plastic cups, one
on the inside of the doll's body and one inside the doll's limb.
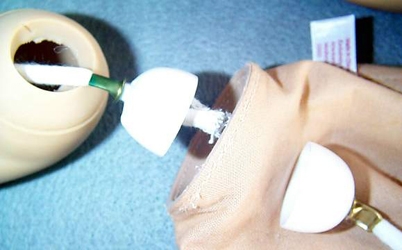
Grab the cup that is inside the limb with the forceps and gently work it out
of the hole at the top of the limb. You may need to heat the end of the limb
with a hair dryer set on high to make it pliable enough to remove the cup. Remove the elastic cord from the cup.
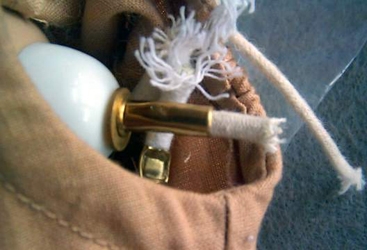
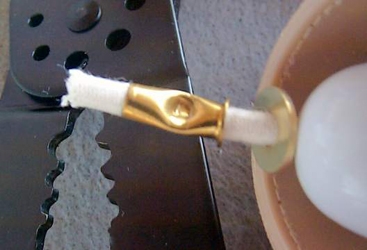
Thread the new elastic cord through a brass ferrule and a brass washer
making certain that the big end of the ferrule is facing the washer. Thread
the cord through the body cup being careful to ensure that the cup is facing
the joint.
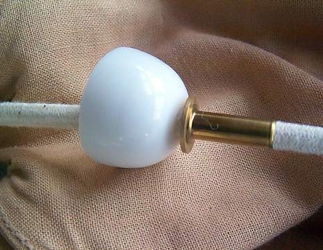
Thread the cord through the open socket joint from the inside and then
through the leg cup, brass washer and brass ferrule.
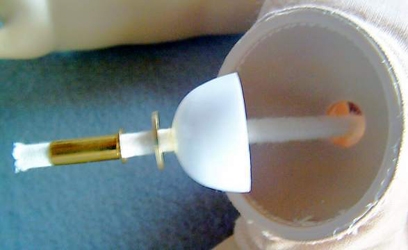
With the crimper, carefully crimp the brass ferrule on the limb end of the
elastic cord.
 |
 |
Gently squeeze the limb cap and insert it into the hole at the top of the
limb (again, you may need to apply some heat to make this easier). Pull the elastic cord to seat the cup neatly against the inside of the
hole.
From the inside of the doll, pull the elastic cord to cinch up joint and
slide the cup, washer and ferrule against the inside of the joint. While
pulling on the cord to apply tension, clamp the forceps immediately above
the brass ferrule.
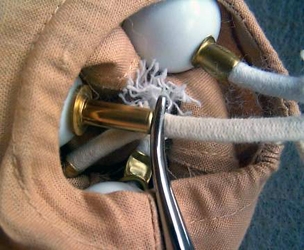
With the forceps maintaining the tension, crimp the ferrule to secure the
cord and cut off the excess elastic cord.
Restuff the doll, packing it into the bottom first so that there are no gaps
and the doll is not misshapen. Putting a little of the stuffing on top of
the doll's shoulders so they look natural.
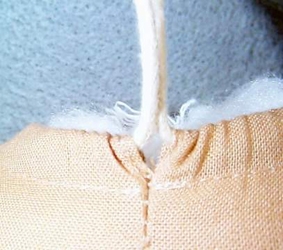
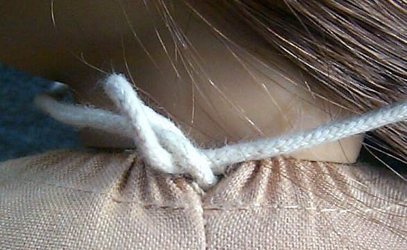
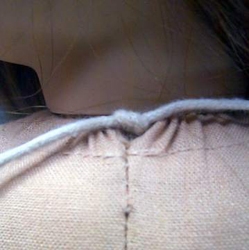
Put the doll's head into the neck opening and cinch the cord to bring the
casing tight around the doll's neck. It should be secure, yet not so tight
as to prevent the doll's head from turning. Tie the cord in a square knot.
Redress the doll and you now have a doll you can enjoy for many years to
come.
 |